Wind Protection DIY Guide
If you happen to be in an area where the wind is a problem, here is a suggestion that many have found helpful to keep the letters in place. An instruction sheet with a list of the parts needed. It may not be 100%, but it's close enough to make the effort worthwhile.
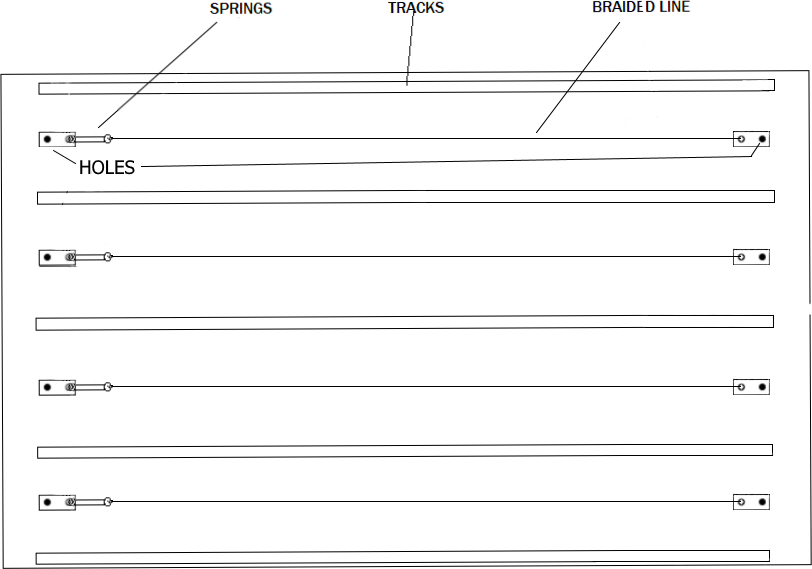
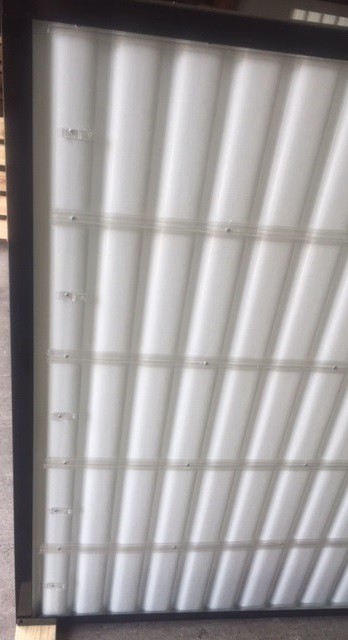
- Drill 2 holes between each row of track, as indicated.
- Next, remove the corner piece on the sign so you can slide the sign face out just far enough to reach the back side of the sign face and the holes you drilled, about 8″ or 10″.
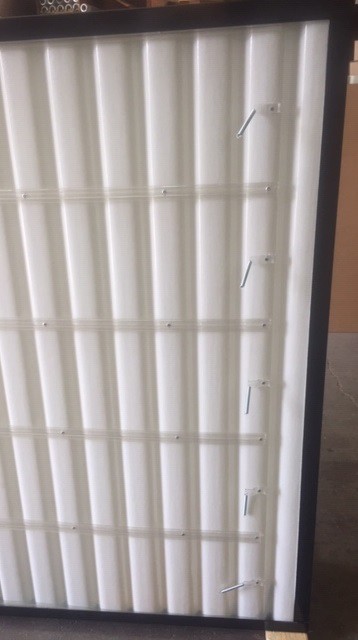
- Using a bolt and nut (non-rusting), mount the tab and spring on one side (either side) and the two holed tab on the other side. When attaching the nut, hand tight is sufficient, no tools necessary. When all tabs are in place, slide the sign face back and return the corner piece
- Tie the line to the spring, then across the sign to the tab. Pull a little tension on the line and tie it off. Do not over tighten the spring. Place letters behind line to help hold them in place from wind.
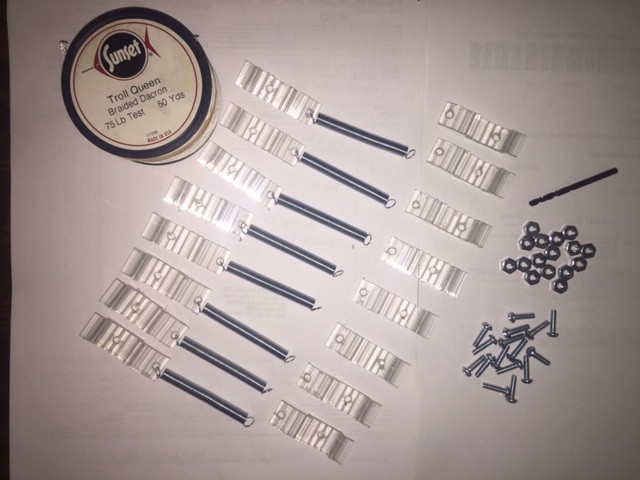
Shown below are all the parts and pieces needed.